Tuesday, May 31, 2011

Blog 6: Bannack Best


Blog 6: High Dynamic Range

This is the final HDR picture of the three shots below. I found that I liked it best on the "grunge" setting and adjust the brightness and darkness levels as needed. Personally, I like the "painted" look the best out of all the custom settings (for this photo) that were available to me through the trial run of photomatix. 

-2;  3:38 pm May 25, 2011; Bannack, Montana; f/3.4; 1/10 sec; Canon PowerShot SX130 IS

0; 3:38 pm May 25, 2011; Bannack, Montana; f/3.4; .5 sec; Canon PowerShot SX130 IS

+2; 3:38 pm May 25, 2011; Bannack, Montana; f/3.4; 1 sec; Canon PowerShot SX130 IS


Blog 6: Bannack Landscape

Ground Focus; May 25, 2011; Bannack, Montana; f/6.3; 1/1600 sec; Canon PowerShot SX130 IS

Horizon Shot; May 25, 2011; Bannack, Montana; f/6.3; 1/1600 sec; Canon PowerShot SX130 IS

Metered to Sky Shot; May 25, 2011; Bannack, Montana; f/8; 1/2500 sec; Canon PowerShot SX130 IS
For the "landscape" shots, I metered the camera at three different angles, but took a picture at the same place. The first one, I pointed the camera at the ground and metered the light, then moved the camera back to where I wanted it and took the shot. Both of the photos where I metered on the ground and the horizon look almost identical, but the shot where I metered the light pointing at the sky made the subject and photograph look darker.

Blog 6: Macro Abstract

Wood texture; May 25, 2011; Bannack, Montana; f/3.4; 1/800 sec; Canon PowerShot SX130 IS

For this photo, I combined the texture shot of the wood on a cabin and the macro shot  of the doorknob. I put the texture shot on top of the doorknob through photoshop and changed the opacity as well as adding a black and white layer. I changed the opacity of this black and white layer as well as the texture layer. 

Door knob; May 25, 2011; Bannack, Montana; f/3.4; 1/800 sec; Canon PowerShot SX130 IS

Blog 6: Reverse Shallow Depth

Distant focus; May 25, 2011; Bannack, Montana; f/4.5; 1/800 sec; Canon PowerShot SX130 IS

Shallow Depth; May 25, 2011; Bannack, Montana; f/4.5; 1/1000 sec; Canon PowerShot SX130 IS

Blog 6: Action Blur and Freeze

Falling; May 25, 2011; Banack, Montana; f/6.3; 1/2500 sec; Canon PowerShot  SX130 IS

Ghost Teacher; May 25, 2011; Bannack, Montana; f/8; 3.2 sec; Canon PowerShot SX130 IS

Blog 6: Bannack Portraits

Pregnant Portrait; 12:15 pm May 25, 2011; Bannack, Montana;  f/4.5;  1/40  sec; Canon PowerShot  SX130 IS
Bannack Portrait; 5: 27 pm May 25, 2011; Bannack, Montana; f/5.0;  1/25 sec; Canon PowerShot SX130 IS
For these shots, I did not do any post editing. I took several different shots of each subject at different angles and camera settings. These two were my favorite portrait shots as I felt that they had the best lighting. The second shot is positioned the way it is because if it was moved more to the right, with the subject looking into the space, I would have gotten more photographers in the shot. So even though some may not like the extra space being on his left side, I was pretty happy with the way this one turned out.

Thursday, May 26, 2011

Blog 5: Portraits/Enhancements

 Side Composition; May 23, 2011; Rexburg, ID; f/5.0; .5 sec; Canon Powesershot

Full Body; May 22, 2011; Rexburg, Idaho; f/4.0; 1/1600 sec; Canon Powershot
Bridal Shower; May 21, 2011; Rexburg, Idaho; f/8; 1/4 sec; Canon Powershot


Two people posing; May 22, 2011; Rexburg, Idaho; f/4.5; 1/16 sec; Canon Powershot
Group Environmental (Watching movies); May 19, 2011; Rexburg, Idaho; f/4.0; .3 sec; Canon Powershot

Monday, May 16, 2011

Blog 4 Edit in Camera Raw

Night shot; May 14, 2011; South Fork, Utah; 8:53 pm; f/3.4; 1/6 sec; Canon PowerShot SX130 IS

Camera Raw Rescue! I really loved how I was able to save the image. At night when I took it, everything around me looked dark so I was able to see the image on my camera after I took it. It was only after I looked at it later in the dark that I saw how badly dark it was and how it looked almost completely black. So all though the edited picture may not be  great, I am happy that I was able to use just camera raw edits to make the image visible. I adjusted the settings on almost every dial in camera raw in order to try to balance it out so that the image is visible but not too pixelated. 

Blog 4 Panoramic

Mountain Panorama. This shot consists of 5 different photos. I had originally taken more pictures but thought that the shot looked better with slightly fewer. I used Photoshop CS5's photo merge to put the images together and cropped some of the edges out. Changing the hue and saturation just a little bit also did a lot for this photo.  


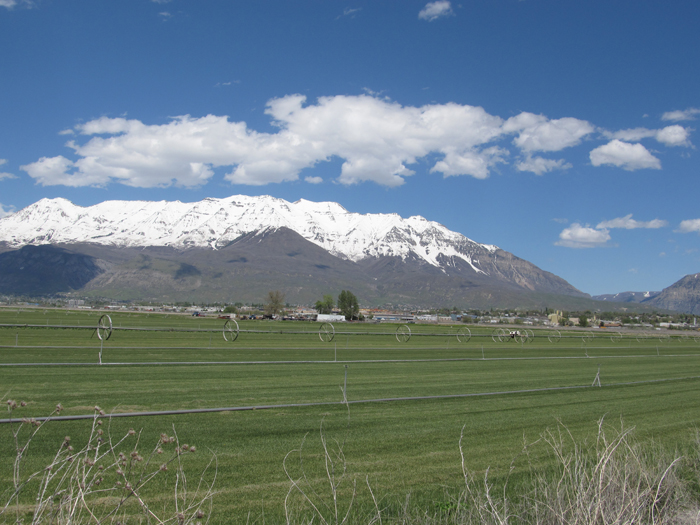
Original Panorama Images: 5/15/11; 3:00 pm; Orem, UT; f/3.5;  1/1250 sec; Canon PowerShot SX130 IS

Monday, May 9, 2011

Blog 3: Adjustment Layers


 1. Prairie Dog; May 8, 2011; Rexburg; f 4.0; 1/2000Canon PowerShot SX130 IS 
This one is my smart filter edit and I really just wanted to play around to see the different kinds of effects that I could get. After adding the smart filter, I added box blur and then used the black paint brush to paint Roxy back in. After this, I tried a few different others just messing around. In this photo, I added the solarization filter which also left out Roxy from when I painted over with the blur. 
1. Miss E; May 8, 2011; Rexburg; f 3.4; 1/8 sec; Canon PowerShot SX130 IS
This is my adjustment layer edit. I actually found it much simpler and easy to use an adjustment layer rather than a smart filter. For this one, I also knew what I wanted to do with it. First, I added a brightness/contrast layer and adjusted it varying amounts until I found what I liked (what you see is at about 80% opacity). Then, I used the paintbrush tool on the layer mask in order to bring out her face more and the white parts of her body so it looks like she is coming out of the image. 

Blog 3: Flora and Fauna


1. Miss Evil; May 8, 2011; Rexburg; f 3.4; 0.5 sec; Canon PowerShot SX130 IS
2. Roxy Dog; May 8, 2011; Rexburg; f 3.5; 1/60 sec; Canon PowerShot SX130 IS
3. Budding Tree; May 9, 2011 morning; Rexburg; f 5.6; 1/400 sec; Canon PowerShot SX130 IS

Monday, May 2, 2011

Blog 2 Blending and Type Effects


Table Texture; May 2, 2011; Rexburg, ID; f/3.4; 1/15 sec

Sunglasses; May 2, 2011; Rexburg, ID; f/3.4; 1/30 sec

For this picture, I used a layer mask and made the top layer have 85% opacity, and then used a soft black paintbrush to fade out the background more than the lenses and the pages of the book. I set the opacity on the black paint brush to about 42% and alternated between using the black and the white paint brush until I was satisfied with the way it looked. 


Memories; May 2, 2011; Rexburg, ID; f/3.4; 1/25 sec

Type Effects: For this image, I took a picture of a key chain I bought in Paris so for the title, I used the french word for "memories" which resembles the english word for souvenirs. To keep with the French theme, I added extra familiar french words and terms and had three different copies that I set to different opacities and one was set to a different font size. 


Blog 2 Study In Color

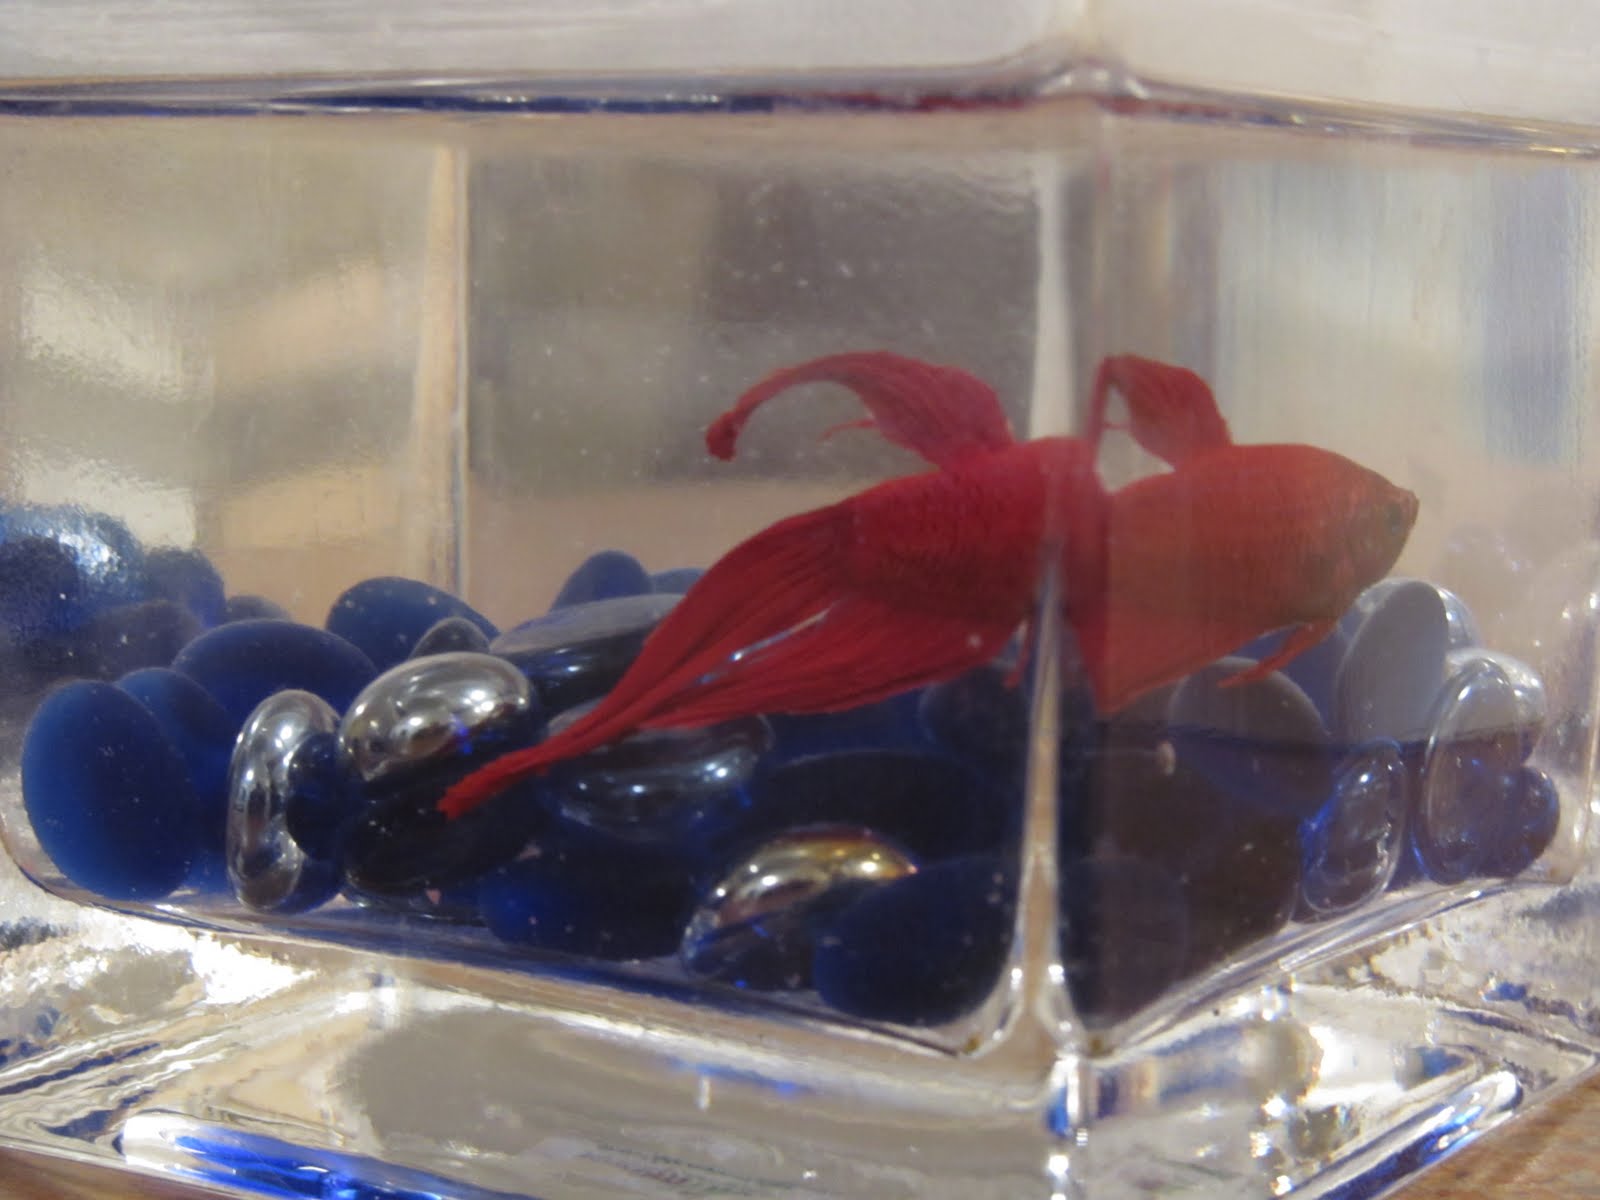
Red Fish; May 2, 2011; Rexburg, ID; f/4.0; 1/4 sec


Red Blanket; May 2, 2011; Rexburg, ID; f/8.0;  0.8 sec

Red Cup; May 2, 2011;Rexburg, ID; f/3.4; 1/6 sec
Red Cup Coaster; May 2, 2011; Rexburg, ID; f/3.4; 1/6 sec